BrandMyMail
step by step
 |
| Go to www.brandmymail.com |
 | |
| Step 2 - drag plugins from right Step 3 - Click to configure plugin |
 |
| Step 4 - Configure your Signature plugin |
 |
| Add and configure more plugins (optional) |
 |
| Step 5 - Select a theme (optional) Step 6 - Preview template (optional) |
 |
| See your template result |
 |
| Step 7 - Sign in with Google |
 |
| Sign in and Accept |
 |
| Step 9 - Install browser extension |
 |
| Step 9 - Go to Gmail or BrandMyMail Dashboard |
 |
| Step 10 - Write your email Step 11 - Click Send or Preview |
 |
| Step 10 - Email preview before sending |
 |
| Sent email |
Some notes:
How to remove plugins?
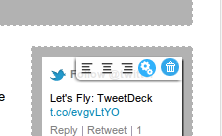 | ||
| You can remove plugins by clicking on Trash icon You can align the plugin, using the justification buttons |
Advanced notes:
Email fixed/expandable width:
When you add a banner bigger than 590px in top container, the email template gets fixed width.
If you use a smaller banner the email stays with 100% width.


